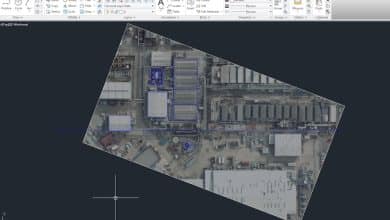
When it comes to accurately representing lot bearings in AutoCAD, it is essential to have a clear understanding of the process. Whether you are a surveyor, civil engineer, or architect, properly plotting lot bearings is crucial for precise land development and design. In this article, we will provide you with a comprehensive guide on how to plot lot bearings in AutoCAD, covering all the essential steps and techniques.
Understanding Lot Bearings
Before diving into the technical aspects, let’s first clarify what lot bearings are. In land surveying, a lot bearing refers to the direction of a property line measured in degrees, minutes, and seconds clockwise from true north or south. It helps define the boundaries of a lot and is critical for accurately representing land parcels on drawings.
Starting with a Basemap
To begin plotting lot bearings in AutoCAD, it is essential to have a basemap or a survey plan of the area. This can be obtained from a surveyor or by digitizing existing paper drawings. Once you have the basemap in a compatible format (such as DWG or DXF), you can proceed with the following steps.
Setting Up AutoCAD
- Open AutoCAD and create a new drawing or use an existing one.
- Ensure that the drawing units are set correctly to match the units used in the basemap. This can be done by accessing the “Units” command and adjusting the settings accordingly.
Importing the Basemap
To import the basemap into AutoCAD:
- Use the “Import” or “Attach” command to bring the basemap into the drawing.
- Adjust the scale and position of the basemap to align it with the existing AutoCAD drawing using the appropriate scaling and moving tools.
Adding Lot Boundary Lines
Now that the basemap is imported, you can start plotting the lot bearings by adding lot boundary lines. Follow these steps:
- Use the “Line” command to draw lines representing the lot boundaries. Make sure to align the lines with the basemap accurately.
- To specify the direction of each boundary line, you can use bearings. In AutoCAD, you can enter the bearing values in the format of degrees, minutes, and seconds or as decimal degrees.
- To draw a line with a specific bearing, use the “Polar Tracking” feature to lock the direction. This feature allows you to draw lines at specific angles relative to the previous line.
Annotating Lot Bearings
To make the plotted lot bearings clear and understandable, it is important to annotate them properly. Here’s how you can do it in AutoCAD:
- Use the “Text” command to add text labels next to the boundary lines.
- Indicate the bearing value and the line’s length, if relevant, to provide comprehensive information.
- Adjust the text size, font, and alignment to ensure readability.
Creating a Bearing Table
To summarize the lot bearings and provide a comprehensive overview, you can create a bearing table in AutoCAD:
- Use the “Table” command to insert a table into the drawing.
- Define the required number of rows and columns to accommodate the bearing information.
- Fill in the table with the lot numbers, corresponding bearings, and any additional relevant data.
- Format the table to enhance its visual appearance, such as adjusting cell borders and text formatting.
Adding Dimensional Information
In addition to lot bearings, it is often necessary to include dimensional information, such as distances between lot lines or between lot corners. To achieve this in AutoCAD:
- Use the “Distance” or “Dim” command to measure and display the distances between different points.
- Place the dimensions near the respective lines or corners to provide a clear representation of the lot’s layout.
Checking Accuracy
After plotting lot bearings in AutoCAD, it is crucial to verify the accuracy of the drawn lines and annotations. Here are some tips for ensuring accuracy:
- Double-check the bearing values and distances against the survey plan or other reliable sources.
- Use AutoCAD’s measuring tools to verify distances and angles.
- Compare the plotted boundaries with any available georeferenced data or aerial imagery for additional validation.
FAQ
1. How do you read a lot bearing?
To read a lot bearing, you need to understand the format in which it is typically represented. A lot bearing is measured in degrees, minutes, and seconds clockwise from true north or south. Here’s a step-by-step guide on how to read a lot bearing:
- Start by identifying the starting point of the lot bearing. This could be a corner of the property or any other reference point.
- Look for the bearing value associated with the specific lot line you want to read. The bearing value will consist of three components: degrees, minutes, and seconds.
- The degrees represent the larger unit of measurement, ranging from 0 to 360. It indicates the direction of the lot line in relation to true north or south.
- The minutes represent a smaller unit of measurement, dividing each degree into 60 parts. They refine the direction of the lot line within the degree range.
- The seconds further divide each minute into 60 parts, providing more precise information about the direction.
- Read the bearing value in a clockwise direction from true north or south. For example, if the bearing is 45 degrees 30 minutes 15 seconds, it means the lot line is oriented 45 degrees clockwise from true north or south.
2. How do I plot bearings in AutoCAD?
To plot bearings in AutoCAD, follow these steps:
- Open AutoCAD and open the drawing where you want to plot the bearings.
- Use the “Line” command to draw the lot lines that correspond to the bearings.
- Specify the starting point of each lot line by clicking on the desired location in the drawing.
- Enter the bearing value of the lot line using the appropriate notation (degrees, minutes, and seconds).
- Activate the “Polar Tracking” feature by pressing the F10 key or enabling it from the status bar.
- With “Polar Tracking” active, move the cursor in the desired direction according to the bearing. The line will snap to the specified angle.
- Continue drawing the lot line by clicking at the desired length or until you reach the next corner or endpoint.
- Repeat these steps for each lot line, ensuring you enter the correct bearing values for each.
3. How do I set distance and bearing in AutoCAD?
To set distance and bearing in AutoCAD, you can use the following procedure:
- Open AutoCAD and open the drawing where you want to set the distance and bearing.
- Use the “Line” command to start drawing the line at the desired location.
- Specify the starting point of the line by clicking on the desired location in the drawing.
- Enter the bearing value of the line using the appropriate notation (degrees, minutes, and seconds).
- Activate the “Polar Tracking” feature by pressing the F10 key or enabling it from the status bar.
- Move the cursor in the desired direction according to the bearing. The line will snap to the specified angle.
- Once the direction is set, enter the desired distance for the line and press Enter.
- AutoCAD will draw the line with the specified bearing and distance.
4. How do you draw a plot of land?
Drawing a plot of land involves representing the boundaries and features of a specific piece of land. To draw a plot of land in AutoCAD, follow these steps:
- Start by importing a basemap or survey plan of the land into AutoCAD. This will serve as a reference for drawing the plot accurately.
- Use the “Line” command to draw lines representing the lot boundaries. Make sure to align the lines with the boundaries specified in the basemap.
- Indicate the corners and key points of the plot by placing points or using the “Point” command.
- Add relevant features such as buildings, roads, or other structures by using appropriate AutoCAD commands like “Rectangle,” “Polygon,” or “Circle.”
- Label the lot lines, corners, and features using the “Text” command, providing clear and descriptive labels for easy identification.
- If necessary, add dimensional information such as distances between lot lines or between corners using the “Dimension” or “Distance” commands.
- Apply appropriate linetypes, colors, and hatches to differentiate between different elements within the plot.
- Finally, review the drawing to ensure accuracy and make any necessary adjustments.
5. How do you plot land?
To plot land in AutoCAD, you can follow the steps outlined below:
- Import a basemap or survey plan of the land into AutoCAD. Ensure that the basemap is properly scaled and positioned within the drawing.
- Use the “Line” command to draw the lot boundaries by connecting the corners and points specified in the basemap.
- If necessary, specify the bearings of the lot lines by using the appropriate bearing values in degrees, minutes, and seconds.
- Add any relevant features such as buildings, roads, or natural elements using appropriate AutoCAD commands like “Rectangle,” “Polygon,” or “Circle.”
- Label the lot lines, corners, and features using the “Text” command, providing clear and descriptive labels for easy identification.
- If required, add dimensional information such as distances between lot lines or between corners using the “Dimension” or “Distance” commands.
- Apply appropriate linetypes, colors, and hatches to differentiate between different elements within the land plot.
- Review the drawing to ensure accuracy and make any necessary adjustments.
6. How do you get a land bearing?
To obtain the land bearing, you need a survey plan or legal description of the land. This information is typically provided by a professional surveyor. Here are the steps to get a land bearing:
- Hire a licensed surveyor to conduct a survey of the land or provide a legal description.
- The surveyor will take precise measurements and collect data on the land boundaries.
- Based on the collected data, the surveyor will determine the bearings of the lot lines.
- The surveyor will provide you with a survey plan or legal description that includes the bearing values for each lot line.
It is essential to rely on the expertise of a licensed surveyor to obtain accurate and reliable land bearings. They have the necessary knowledge, equipment, and experience to conduct land surveys and determine precise bearing values.
7. How do you plot a lot with coordinates?
To plot a lot with coordinates in AutoCAD, follow these steps:
- Obtain the coordinate data for the lot corners from a surveyor or other reliable sources.
- Open AutoCAD and create a new drawing or use an existing one.
- Set the drawing units to match the coordinate system used for the lot. This ensures accurate plotting of the lot with the provided coordinates.
- Use the “Point” command to place points at the coordinates of the lot corners. Enter the X, Y, and Z coordinates (if applicable) for each point.
- Connect the points using the “Line” command to draw the lot boundaries.
- Add any additional features or labels as required using appropriate AutoCAD commands.
- Review the drawing to ensure accuracy and make any necessary adjustments.
8. How do you draw a bearing line?
To draw a bearing line in AutoCAD, you can follow these steps:
- Open AutoCAD and open the drawing where you want to draw the bearing line.
- Use the “Line” command to start drawing the line at the desired location.
- Specify the starting point of the line by clicking on the desired location in the drawing.
- Enter the bearing value of the line using the appropriate notation (degrees, minutes, and seconds).
- Activate the “Polar Tracking” feature by pressing the F10 key or enabling it from the status bar.
- Move the cursor in the desired direction according to the bearing. The line will snap to the specified angle.
- Click to define the endpoint of the line, or enter a distance value to determine its length.
- AutoCAD will draw the line with the specified bearing and length.
9. How do you plot Northings and Eastings in AutoCAD?
Plotting Northings and Eastings in AutoCAD involves using the coordinate system to accurately position points or draw lines. Here’s how you can do it:
- Obtain the Northings and Eastings coordinate values for the desired points from a reliable source or survey plan.
- Open AutoCAD and create a new drawing or use an existing one.
- Set the drawing units to match the coordinate system used for the Northings and Eastings. This ensures accurate plotting of the points with the provided coordinates.
- Use the “Point” command to place points at the specified Northings and Eastings coordinates. Enter the appropriate values for each point.
- Connect the points using the “Line” command to draw lines representing lot boundaries or any desired features.
- Add any additional labels or annotations as required using appropriate AutoCAD commands.
- Review the drawing to ensure accuracy and make any necessary adjustments.
10. How do you label bearings?
To label bearings in AutoCAD, you can use the following steps:
- Identify the lot lines or features that require bearing labels.
- Use the “Text” command to add text labels at the desired locations.
- Enter the appropriate bearing value for each label, including degrees, minutes, and seconds, or as specified in your labeling conventions.
- Adjust the text size, font, and alignment to ensure readability and clarity.
- Position the labels next to the corresponding lot lines or features, ensuring they are clearly associated with the appropriate bearing.
- Repeat these steps for all the bearings you want to label within your drawing.
11. How do you add a bearing in Civil 3D?
To add a bearing in Civil 3D, you can follow these steps:
- Open Civil 3D and open the drawing where you want to add the bearing.
- Use the “Line” or “Polyline” command to draw the line or polyline where the bearing will be added.
- Select the line or polyline and access the “Properties” palette or right-click and choose “Properties” to open the properties window.
- In the properties window, locate the “Geometry” section.
- Within the “Geometry” section, you will find options to add or edit bearings.
- Enter the bearing value in the appropriate format (degrees, minutes, and seconds) or as specified by your project requirements.
- Apply the changes, and the bearing will be added to the selected line or polyline.
12. How do I draw a plot plan of my property?
Drawing a plot plan of your property involves accurately representing the boundaries and features of the land you own. To draw a plot plan of your property, you can follow these steps:
- Obtain a survey plan or legal description of your property from a licensed surveyor or relevant authorities.
- Measure and record the dimensions of your property using appropriate tools, such as a measuring tape or laser rangefinder.
- Open AutoCAD or a similar CAD software and create a new drawing.
- Use the “Line” command to draw lines representing the boundaries of your property. Ensure the dimensions and angles match the measurements from your survey plan or legal description.
- Add any existing structures, such as buildings, driveways, or fences, using appropriate AutoCAD commands like “Rectangle,” “Polygon,” or “Circle.”
- Label the boundaries, structures, and any other relevant features using the “Text” command, providing clear and descriptive labels.
- If required, add dimensional information such as distances between property lines or between structures using the “Dimension” or “Distance” commands.
- Apply appropriate linetypes, colors, and hatches to differentiate between different elements within the plot plan.
- Review the drawing to ensure accuracy and make any necessary adjustments.
13. How do you create a land layout?
Creating a land layout involves designing the arrangement of various elements on a piece of land, such as buildings, roads, and landscaping features. To create a land layout, you can follow these steps:
- Obtain a survey plan or topographic map of the land, which provides information about the existing features, topography, and any constraints.
- Open AutoCAD or a similar CAD software and create a new drawing.
- Use the survey plan or topographic map as a reference to draw the boundaries of the land using the “Line” command.
- Add any existing structures, such as buildings or roads, by using appropriate AutoCAD commands like “Rectangle,” “Polygon,” or “Circle.”
- Consider the desired layout and functionality of the land. Determine the location of key elements, such as buildings, parking lots, paths, and landscaping areas.
- Use AutoCAD commands to draw and position these elements accurately within the land boundaries.
- Label the elements, including buildings, roads, and other features, using the “Text” command, providing clear and descriptive labels for easy identification.
- Apply appropriate linetypes, colors, and hatches to differentiate between different elements within the land layout.
- Review the drawing to ensure accuracy and make any necessary adjustments.
Conclusion
Plotting lot bearings in AutoCAD is a fundamental task for professionals involved in land surveying and design. By following the steps outlined in this comprehensive guide, you can accurately represent lot boundaries and create informative drawings. Remember to always double-check your work and consult with experts when needed to ensure the highest level of precision in your AutoCAD drawings.