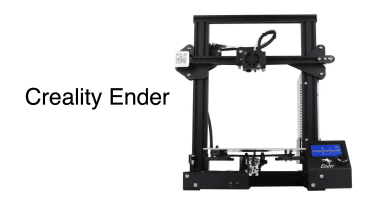
The Ender 3 is one of the most popular and affordable 3D printers on the market, offering high-quality prints at a low price point. However, like any piece of technology, it’s not immune to issues and errors. In this guide, we’ve compiled 50 of the most common questions and problems Ender 3 users may encounter, along with detailed answers and solutions to help you troubleshoot your printer and achieve successful prints.
Whether you’re a beginner or a seasoned 3D printing enthusiast, this guide has something for everyone. From fixing bent rods and loose pulleys to resolving SD card errors and hotend issues, we’ve covered it all. With this comprehensive FAQ guide, you’ll be able to identify and solve common Ender 3 issues quickly and easily, allowing you to spend more time printing and less time troubleshooting.
50 Common Questions About Ender 3: Your Ultimate Troubleshooting Guide
1. Why is my Ender 3’s print quality poor?
There are several factors that can contribute to poor print quality on an Ender 3. These include incorrect temperature settings, poor bed adhesion, and insufficient bed leveling. To improve print quality, it is important to ensure that the nozzle temperature is optimized for the material being used. This can be found in the filament manufacturer’s guidelines or through trial and error.
Additionally, bed adhesion is crucial to ensure that prints stick to the build surface. The use of adhesion aids, such as painter’s tape, hairspray, or glue stick, can help improve bed adhesion. Make sure the bed is leveled correctly by adjusting the springs and knobs under the bed. This ensures that the nozzle’s distance from the bed is consistent across the entire surface, resulting in a better print.
Lastly, it is essential to calibrate the printer’s settings, such as retraction and flow rate, to avoid issues like stringing, blobs, or gaps in the print. Proper calibration is achieved through testing and adjusting these settings to find the optimal values for your specific printer and filament.
2. What causes Ender 3 bed leveling issues?
Bed leveling issues on an Ender 3 are commonly caused by a combination of factors such as an uneven build surface, loose bed springs, or worn-out leveling knobs. An uneven build surface can result from warping or damage, making it difficult to maintain consistent nozzle-to-bed distance. In this case, it may be necessary to replace the build surface or use a glass bed for better flatness.
Loose bed springs can lead to an unstable bed, which can cause the leveling knobs to shift during the print. To resolve this issue, you can replace the stock springs with stiffer or upgraded springs to maintain consistent bed leveling. Worn-out leveling knobs may also cause difficulty in maintaining consistent bed leveling. Replacing the knobs with upgraded or metal ones can provide a more stable and precise adjustment.
It is important to level the bed using a piece of paper or a feeler gauge to maintain a consistent nozzle-to-bed distance. Recheck and readjust the bed leveling periodically to ensure optimal print quality, especially after long or frequent printing sessions.
3. How can I fix Ender 3 under-extrusion problems?
Under-extrusion on an Ender 3 can be caused by a variety of factors such as incorrect nozzle temperature, low flow rate, or a clogged nozzle. To fix under-extrusion, first ensure that the nozzle temperature is set correctly for the specific filament being used. If the temperature is too low, the filament may not melt properly, resulting in under-extrusion. Increasing the temperature may help alleviate this issue.
Next, check the flow rate in your slicer settings. A low flow rate may result in insufficient material being extruded. Try increasing the flow rate in small increments until the desired extrusion is achieved. It is also essential to make sure that the filament is properly fed into the extruder, and there are no obstructions in the path.
Lastly, a clogged nozzle can cause under-extrusion by obstructing the flow of filament. To fix this issue, perform a cold pull or use a nozzle cleaning needle to remove the clog. Periodic nozzle maintenance, including cleaning and replacement, can help prevent under-extrusion problems in the future.
4. What causes Ender 3 over-extrusion issues?
Over-extrusion issues in an Ender 3 can be caused by various factors such as incorrect slicer settings, improper filament diameter, and issues with the extruder gear. First, check your slicer settings to ensure that the extrusion multiplier, flow rate, or filament settings are set correctly. A high extrusion multiplier or flow rate can lead to over-extrusion, so try reducing these values incrementally until the issue is resolved.
Next, verify that the filament diameter setting in your slicer matches the actual diameter of the filament you are using. Using an incorrect filament diameter setting can result in over-extrusion. Measure your filament with a digital caliper and adjust the slicer settings accordingly.
Lastly, inspect the extruder gear for damage or debris, as this can cause inconsistent extrusion. Clean the gear and remove any debris, or replace the gear if it appears worn or damaged. Additionally, ensure that the extruder tension is set correctly to maintain a consistent grip on the filament during the extrusion process.
5. Why is my Ender 3’s heated bed not reaching the desired temperature?
There are several reasons why an Ender 3’s heated bed may not reach the desired temperature, including a faulty heating element, poor wiring connections, or inadequate power supply. First, check the heated bed’s wiring connections to ensure they are secure and not damaged. Loose or damaged connections can prevent the bed from heating properly.
Next, verify that the power supply is providing sufficient power to the printer. A power supply that is not providing adequate voltage or current can cause issues with the heated bed reaching the desired temperature. If you suspect your power supply is the issue, consider replacing it with a higher wattage or better-quality unit.
If the wiring connections and power supply are functioning correctly, the heating element itself may be faulty. Inspect the heating element for any visible damage, and use a multimeter to test for continuity. If the heating element is determined to be faulty, it will need to be replaced to resolve the issue.
6. How can I resolve Ender 3’s filament grinding problems?
Filament grinding on an Ender 3 can be caused by various factors such as excessive extruder tension, a clogged nozzle, or filament quality issues. First, check the extruder tension to ensure that it is not too tight. Excessive tension can cause the extruder gear to grind into the filament, resulting in feeding problems. Adjust the tension screw to reduce the pressure on the filament.
Next, inspect the nozzle for any clogs or debris that may be causing filament grinding. Perform a cold pull or use a nozzle cleaning needle to clear any clogs. Regular nozzle maintenance can help prevent filament grinding issues in the future.
Lastly, evaluate the quality of the filament being used. Poor-quality filament may have inconsistent diameter or contain impurities that can contribute to grinding issues. Using high-quality filament with consistent diameter and proper storage can help prevent filament grinding problems.
7. Why is my Ender 3’s print head jamming?
Print head jamming on an Ender 3 can be caused by several factors, including a clogged nozzle, heat creep, or filament quality issues. First, inspect the nozzle for any clogs or debris that may be obstructing the flow of filament. Perform a cold pull or use a nozzle cleaning needle to clear any clogs. Regular nozzle maintenance can help prevent print head jamming issues in the future.
Next, heat creep can cause the filament to soften and jam in the heat break or heat sink of the hotend. This is often due to insufficient cooling or improper temperature settings. Ensure that the hotend cooling fan is functioning correctly and that the temperature settings are appropriate for the filament being used. If necessary, upgrade the cooling system for better performance.
Lastly, the quality of the filament being used can contribute to print head jamming. Poor-quality filament may have inconsistent diameter or contain impurities that can cause jamming. Using high-quality filament with consistent diameter and proper storage can help prevent print head jamming issues.
8. What causes Ender 3 layer shifting issues?
Layer shifting issues on an Ender 3 can be caused by various factors, such as loose belts, mechanical obstructions, or incorrect slicer settings. First, check the belts on both the X and Y axes for proper tension. Loose belts can cause the print head to lose position, resulting in layer shifts. Tighten the belts to ensure they are properly tensioned and replace them if they appear worn or damaged.
Next, inspect the printer’s frame, rods, and bearings for any mechanical obstructions or debris that may be causing the print head to lose position. Clean and lubricate the rods and bearings as needed to ensure smooth motion. Additionally, ensure that the printer’s frame is square and properly aligned.
Lastly, review your slicer settings to ensure that the print speed, acceleration, and jerk settings are appropriate for your specific printer and filament. Excessive speeds or aggressive motion settings can cause layer shifting issues. Adjust these settings as needed to find a balance between print speed and accuracy that works for your setup.
9. How can I fix Ender 3 stringing or oozing problems?
Stringing or oozing problems on an Ender 3 can be caused by factors such as incorrect temperature settings, insufficient retraction, or poor print cooling. First, verify that the nozzle temperature is set correctly for the specific filament being used. Higher temperatures can cause the filament to ooze more easily, so try reducing the temperature in small increments until the issue is resolved.
Next, check your slicer’s retraction settings. Insufficient retraction can cause the filament to continue oozing during travel moves, leading to stringing. Increase the retraction distance and speed incrementally until the issue is resolved. Keep in mind that excessive retraction can lead to other issues such as clogs or under-extrusion, so finding the right balance is crucial.
Lastly, ensure that the print cooling fan is functioning correctly and providing sufficient cooling to the printed material. Poor cooling can cause the filament to remain soft and prone to stringing. If necessary, upgrade the cooling system or adjust the fan speed settings in your slicer to improve print cooling.
10. Why is my Ender 3’s extruder skipping steps?
Extruder skipping steps on an Ender 3 can be caused by various factors, such as a clogged nozzle, incorrect motor current, or filament feeding issues. First, check the nozzle for any clogs or debris that may be obstructing the flow of filament. Perform a cold pull or use a nozzle cleaning needle to clear any clogs. Regular nozzle maintenance can help prevent extruder skipping issues in the future.
Next, ensure that the motor current for the extruder is set correctly. Incorrect motor current can cause the extruder motor to skip steps, resulting in under-extrusion or inconsistent extrusion. Consult your printer’s documentation for recommended motor current settings, and adjust the current using the printer’s firmware or control board if necessary.
Lastly, verify that the filament is properly fed into the extruder and that there are no obstructions in the path. Filament feeding issues can result from tangled filament spools, a misaligned filament guide, or a worn-out extruder gear. Untangle the filament, ensure that the guide is properly aligned, and clean or replace the extruder gear if it appears worn or damaged. Proper filament feeding is essential for consistent extrusion and preventing skipped steps in the extruder.
11. How can I resolve Ender 3’s inconsistent extrusion issues?
Inconsistent extrusion on your Ender 3 can be caused by various factors. To resolve this issue, you need to take a systematic approach to diagnose the problem and apply the necessary solutions.
First, check the filament quality and diameter consistency. Low-quality or inconsistent filament can cause extrusion problems. Ensure you’re using high-quality filament from a reliable supplier. Additionally, measure the filament diameter at several points using a digital caliper to confirm it’s consistent with the specified diameter, usually 1.75mm.
Second, inspect the extruder assembly for wear and tear, especially the drive gear. Over time, the teeth on the drive gear can become worn, reducing its grip on the filament. If you notice any wear, replace the drive gear. Furthermore, ensure the extruder tension is properly adjusted. Too much tension can deform the filament, while too little can cause slippage.
Lastly, consider other factors that can contribute to inconsistent extrusion, such as improper hotend temperature, partial nozzle clogs, or a worn-out PTFE tube. Adjust the hotend temperature according to your filament’s specifications, perform a “cold pull” to clear any partial clogs, and replace the PTFE tube if it’s damaged or worn out.
12. What causes Ender 3 ghosting or ringing?
Ghosting or ringing is a common issue in 3D printing and refers to artifacts on the print surface that resemble echoes or shadows of sharp edges or corners. These artifacts are caused by vibrations and inertia in the printer’s motion system.
To minimize ghosting, first, ensure that your printer’s frame is sturdy and securely fastened. Tighten all screws, bolts, and nuts, and verify that the frame is not wobbling during operation. Adding bracing or reinforcement to the frame can also help to reduce vibrations and improve print quality.
Next, check the belt tension on the X and Y axes. Loose belts can contribute to ringing by allowing the print head to oscillate after sudden direction changes. Adjust the belt tensioners or replace worn belts to maintain proper tension. Additionally, ensure that the stepper motor drivers are properly tuned and that the acceleration and jerk settings in your slicer are optimized for your printer.
Lastly, consider printing at a slower speed. While this may increase print times, it will reduce the amount of inertia the printer’s motion system must overcome, leading to better print quality and less ghosting.
13. Why is my Ender 3’s Z-axis binding?
Z-axis binding occurs when the threaded rods or lead screws that control the vertical movement of the print head or bed become misaligned or obstructed, causing the axis to move unevenly or get stuck. There are several possible causes for this issue.
First, inspect the Z-axis lead screws for dirt, debris, or damage. Clean the lead screws with a soft brush and lubricate them with a thin layer of white lithium grease or PTFE lubricant. Ensure that the lead screws are straight and replace them if they’re bent or damaged.
Next, check the alignment of the lead screws and their corresponding brass nuts. Misaligned screws can cause binding and uneven movement. Loosen the screws holding the brass nuts in place, move the Z-axis up and down to help the nuts self-align, and then retighten the screws. Additionally, verify that the Z-axis motor mounts are level and parallel to the frame.
Lastly, examine the smooth rods and linear bearings on the Z-axis. Ensure that the rods are straight and free of dirt or debris. Clean them with a soft cloth and apply a thin layer of light machine oil or PTFE lubricant. Check the linear bearings for wear or damage, and replace them if necessary. Proper maintenance and alignment of the Z-axis components should help eliminate binding and ensure smooth operation.
14. How can I fix Ender 3’s warped or uneven prints?
Warped or uneven prints can be caused by various factors, including an unlevel print bed, incorrect bed temperature, or insufficient adhesion. To fix these issues, follow the steps below.
First, level the print bed using the printer’s built-in bed leveling system or manual leveling procedure. Start by adjusting the four corners of the bed using the leveling knobs or screws, ensuring that the nozzle is at the correct height from the bed at each point. Repeat the process until the bed is level across its entire surface.
Next, set the correct bed temperature for your filament type. Different materials have different optimal bed temperatures for proper adhesion. Consult the filament manufacturer’s recommendations and adjust the bed temperature accordingly. A heated bed can help reduce warping and improve first layer adhesion.
Finally, consider using an adhesive solution or surface to improve print adhesion. Options include painter’s tape, glue stick, hairspray, or specialized print surfaces like PEI sheets or BuildTak. Experiment with different solutions to find the one that works best for your specific filament and printer setup.
15. What causes Ender 3 filament breakage or snapping?
Filament breakage or snapping can be caused by several factors, such as moisture absorption, age, brittleness, or filament tension. Identifying and addressing the underlying cause can help prevent this issue.
First, ensure that your filament is properly stored when not in use. Filament can absorb moisture from the air, leading to a weakened or brittle structure. Store your filament in a dry, airtight container with desiccant packets to minimize moisture exposure. You can also dry out moisture-affected filament using a filament dryer or a low-temperature oven.
Next, consider the age and quality of your filament. Older filament may become brittle over time, increasing the likelihood of breakage. Replace old or low-quality filament with fresh, high-quality filament from a reputable manufacturer.
Lastly, examine the filament path in your printer for any obstructions or sharp bends that could cause excessive tension on the filament. Ensure that the filament spool can rotate freely and that the filament path is free of kinks or sharp angles. Adjust the filament path and spool holder if necessary to minimize tension and reduce the risk of breakage.
16. Why is my Ender 3’s print not sticking to the bed?
There are several possible reasons why your Ender 3’s print may not be sticking to the bed, including an unlevel bed, improper nozzle height, incorrect bed temperature, or insufficient adhesion. To resolve this issue, follow the steps outlined below.
First, ensure that your print bed is level and that the nozzle is at the correct height from the bed. Use the printer’s built-in bed leveling system or manual leveling procedure to adjust the bed height at each corner. A level bed and proper nozzle height are critical for achieving good first layer adhesion.
Next, set the correct bed temperature for your filament type. Different materials require different bed temperatures to adhere properly. Consult the filament manufacturer’s recommendations and adjust the bed temperature accordingly. A heated bed can significantly improve first layer adhesion and reduce the likelihood of prints detaching from the bed during printing.
17. How can I fix Ender 3’s “thermal runaway” error?
A “thermal runaway” error occurs when your Ender 3’s temperature control system detects a significant deviation from the target temperature, which could be due to a malfunctioning component or a loose connection. To fix this error, follow the steps below.
First, turn off your printer and unplug it from the power source. This ensures your safety while working on the printer’s components. Next, check the connections for the hotend and bed thermistors. These temperature sensors are responsible for providing temperature feedback to the printer’s control board. Ensure that the thermistor wires are securely connected and not damaged.
Inspect the heater cartridge and bed heater for any visible signs of damage or wear. If you find any issues, replace the damaged components with new ones. Additionally, ensure that the heater cartridge is properly seated within the hotend and that the bed heater is firmly attached to the bed.
Once you have checked all connections and components, power up the printer and attempt to heat the hotend and bed again. If the “thermal runaway” error persists, it may be necessary to update your printer’s firmware or replace the control board, as these components may be responsible for the temperature control issues.
18. What causes Ender 3’s “min temp” or “max temp” errors?
“Min temp” and “max temp” errors on your Ender 3 can be caused by various factors, such as a faulty thermistor, a damaged heater cartridge, or a problem with the control board. To diagnose and resolve these errors, follow the steps below.
First, turn off the printer and unplug it from the power source for safety. Check the connections for the hotend and bed thermistors. Ensure that the thermistor wires are securely connected and not damaged. If you find any loose or damaged connections, repair or replace them as necessary.
Next, inspect the heater cartridge and bed heater for any visible signs of damage or wear. If you find any issues, replace the damaged components with new ones. Additionally, ensure that the heater cartridge is properly seated within the hotend and that the bed heater is firmly attached to the bed.
If the connections and components appear to be in good condition, the issue may lie with the control board or firmware. Try updating your printer’s firmware to the latest version. If the problem persists, consider replacing the control board, as it may be faulty and causing the temperature errors.
19. Why is my Ender 3’s firmware not updating?
Failure to update your Ender 3’s firmware can be due to several factors, such as an improper update procedure, incorrect firmware files, or a problem with the control board or bootloader. To resolve this issue, follow the steps below.
First, ensure that you are using the correct firmware update procedure for your specific Ender 3 model. There are different procedures for updating the firmware on different Ender 3 models, such as the Ender 3, Ender 3 Pro, and Ender 3 V2. Consult your printer’s user manual or manufacturer’s website for the appropriate update method and follow the instructions carefully.
Next, verify that you have downloaded the correct firmware files for your printer model. Using the wrong firmware files can lead to failed updates or compatibility issues. Download the latest firmware files from the manufacturer’s website or from trusted sources within the 3D printing community. Be sure to select the correct files for your specific Ender 3 model.
If you have followed the correct update procedure and used the appropriate firmware files, but the firmware still does not update, the issue may lie with the control board or the bootloader. Some Ender 3 models may require a bootloader to be installed before firmware updates can be applied. In this case, you will need to flash a bootloader onto the control board using an Arduino or a dedicated programmer. Consult online guides and resources for instructions on flashing a bootloader for your specific Ender 3 model.
20. How can I fix Ender 3’s clogged nozzle issues?
Clogged nozzles are a common issue in 3D printing and can be caused by factors such as filament contamination, excessive heat, or printing with materials that are prone to clogging. To fix a clogged nozzle on your Ender 3, follow the steps below.
First, try performing a “cold pull” or “atomic pull” to clear the clog. Heat the hotend to the filament’s printing temperature and then lower the temperature to around 80-100°C. Manually push a small amount of filament through the nozzle, and then quickly pull it back out. This process can help dislodge and remove any material stuck inside the nozzle.
If the cold pull does not resolve the clog, remove the nozzle from the hotend for a more thorough cleaning. Heat the hotend to the filament’s printing temperature.
You can also soak the nozzle in acetone or a similar solvent to dissolve any stubborn residues. After cleaning, thoroughly dry the nozzle and reinstall it onto the hotend, ensuring a snug fit.
Additionally, consider using a filament cleaner or dust filter to prevent contamination from entering the nozzle. Filament can sometimes pick up dust and debris during the printing process, which can contribute to clogs. Placing a small sponge or foam filter around the filament before it enters the extruder can help catch any contaminants before they reach the nozzle.
To prevent future clogs, ensure that you are using high-quality filament from a reputable supplier and that you store it properly to minimize moisture absorption. Also, adjust your printing temperatures according to the filament manufacturer’s recommendations, as printing at excessively high temperatures can cause some materials to degrade and clog the nozzle. Regular nozzle maintenance and proper printing practices can help reduce the occurrence of clogs and ensure a smoother 3D printing experience with your Ender 3.
21. What causes Ender 3’s extruder motor overheating?
There could be several reasons for the Ender 3’s extruder motor overheating. One of the common reasons is a clogged nozzle or filament jam. When the nozzle gets clogged, the extruder motor has to work harder to push the filament through, causing it to overheat. Another reason could be a faulty thermistor or heating element, which can cause the temperature to rise above the recommended range, leading to overheating. In some cases, the extruder motor can also overheat due to a damaged or faulty stepper driver.
To fix the extruder motor overheating issue, the first step is to check the nozzle for any clogs or filament jams. If there is a clog, the nozzle needs to be cleaned or replaced. It’s also important to check the thermistor and heating element to ensure they are functioning correctly. If there is a problem with either of these components, they will need to be replaced. Additionally, it’s important to check the stepper driver to ensure it’s not damaged or faulty. If it is, it may need to be replaced as well.
Another solution to prevent extruder motor overheating is to adjust the extruder motor current. The extruder motor current determines the amount of power that the motor receives, and if it’s set too high, it can cause overheating. To adjust the extruder motor current, the printer’s firmware settings need to be modified. This process can vary depending on the printer model and firmware used, so it’s recommended to refer to the printer manual or online resources for guidance.
22. Why is my Ender 3’s LCD screen not working?
If your Ender 3’s LCD screen is not working, there could be several reasons for it. One of the common reasons is a loose or disconnected cable. The cable connecting the LCD screen to the control board may have become loose or disconnected, causing the screen to stop working. Another reason could be a damaged or faulty LCD screen or control board.
To fix the issue, the first step is to check the connection between the LCD screen and the control board. If the cable is loose or disconnected, it needs to be reconnected firmly. If the connection is intact, the next step is to check the LCD screen and control board for any damage or faults. If the LCD screen is damaged, it may need to be replaced. Similarly, if the control board is faulty, it may need to be repaired or replaced.
Another possible solution is to check the firmware settings. Sometimes, the LCD screen may stop working due to incorrect firmware settings. In this case, the firmware settings need to be checked and modified if necessary. It’s important to refer to the printer manual or online resources for guidance on how to modify the firmware settings.
23. How can I fix Ender 3’s X-axis or Y-axis grinding noise?
If your Ender 3’s X-axis or Y-axis is making a grinding noise, it could be due to several reasons. One of the common reasons is insufficient lubrication. When the rails and bearings are not lubricated properly, they can cause friction, leading to a grinding noise. Another reason could be loose belts or pulleys. If the belts or pulleys are loose, they can cause the stepper motor to slip, resulting in a grinding noise.
To fix the grinding noise issue, the first step is to check the lubrication of the rails and bearings. If they are not lubricated properly, they need to be lubricated using a suitable lubricant. It’s important to use a lubricant that’s recommended by the manufacturer to avoid any damage to the printer. The next step is to check the belts and pulleys. If they are loose, they need to be tightened or replaced. It’s important to ensure that the belts are tight enough to prevent slipping but not too tight that they cause excessive tension. The pulleys should also be checked for any damage or wear and tear. If they are damaged, they need to be replaced.
Another possible solution is to adjust the stepper motor current. The stepper motor current determines the amount of power that the motor receives, and if it’s set too high, it can cause the motor to overheat, resulting in a grinding noise. To adjust the stepper motor current, the printer’s firmware settings need to be modified. This process can vary depending on the printer model and firmware used, so it’s recommended to refer to the printer manual or online resources for guidance.
If none of the above solutions work, it’s possible that the stepper motor or driver is faulty and needs to be replaced. It’s recommended to contact the manufacturer or a professional technician to diagnose and fix the issue to avoid any further damage to the printer.
24. What causes Ender 3’s inaccurate temperature readings?
Inaccurate temperature readings on an Ender 3 can be caused by a few different factors. One common cause is a faulty thermistor or temperature sensor. If the thermistor is damaged or not functioning properly, it can send incorrect temperature readings to the printer’s control board. Another possible cause is a loose or damaged heater cartridge. If the heater cartridge is not making proper contact with the heating block, it can cause inaccurate temperature readings.
To fix the issue of inaccurate temperature readings, the first step is to check the thermistor and heater cartridge connections. The connections should be checked for any signs of damage or looseness, and if any issues are found, the components may need to be replaced. It’s important to ensure that the replacement components are compatible with the printer’s model and firmware.
Another solution is to recalibrate the printer’s temperature settings. This can be done by adjusting the firmware settings of the printer to account for any inaccuracies in the temperature readings. It’s important to refer to the printer manual or online resources for guidance on how to modify the firmware settings. Additionally, it’s recommended to use a reliable and accurate thermometer to confirm the temperature readings and ensure that the adjustments made are accurate.
If none of the above solutions work, it’s possible that the control board is damaged and needs to be replaced. It’s recommended to contact the manufacturer or a professional technician to diagnose and fix the issue to avoid any further damage to the printer.
25. Why is my Ender 3’s extruder clicking or ticking?
If your Ender 3’s extruder is clicking or ticking, it’s usually an indication of a problem with the filament feed. One of the common reasons for this issue is a clogged nozzle or filament jam. When the filament is unable to move through the nozzle smoothly, it can cause the extruder motor to click or tick. Another possible reason is a loose or damaged extruder gear. If the gear is not making proper contact with the filament, it can cause the motor to skip steps and make clicking or ticking sounds.
To fix the issue, the first step is to check the nozzle for any clogs or filament jams. If there is a clog, the nozzle needs to be cleaned or replaced. It’s also important to ensure that the filament is loaded correctly and is not tangled or caught on any part of the printer. Additionally, it’s recommended to check the extruder gear to ensure that it’s not loose or damaged. If it is, it may need to be tightened or replaced.
Another solution is to adjust the extruder motor current. The extruder motor current determines the amount of power that the motor receives, and if it’s set too high, it can cause the motor to overheat and make clicking or ticking sounds. To adjust the extruder motor current, the printer’s firmware settings need to be modified. This process can vary depending on the printer model and firmware used, so it’s recommended to refer to the printer manual or online resources for guidance.
If none of the above solutions work, it’s possible that the extruder motor or driver is faulty and needs to be replaced. It’s recommended to contact the manufacturer or a professional technician to diagnose and fix the issue to avoid any further damage to the printer.
26. How can I resolve Ender 3’s “no SD card” error?
If your Ender 3 is displaying a “no SD card” error message, it could be due to several reasons. One common reason is a faulty or damaged SD card. If the SD card is damaged or not functioning properly, it can cause the printer to not detect the card. Another possible reason is a loose or disconnected SD card reader. If the SD card reader is not making proper contact with the SD card, it can cause the printer to not detect the card.
To fix the issue, the first step is to check the SD card and SD card reader connections. The connections should be checked for any signs of damage or looseness, and if any issues are found, the components may need to be replaced. It’s also recommended to try using a different SD card to confirm whether the issue is with the card or the printer.
Another solution is to format the SD card. Sometimes, formatting the SD card can resolve any issues with the file system and allow the printer to detect the card. It’s important to note that formatting the SD card will erase all data on the card, so it’s recommended to backup any important data before formatting.
If none of the above solutions work, it’s possible that the firmware on the printer is outdated or corrupt. In this case, updating or reinstalling the firmware may resolve the issue. It’s recommended to refer to the printer manual or online resources for guidance on how to update or reinstall the firmware. Additionally, it’s important to ensure that the firmware used is compatible with the printer’s model and hardware.
27. What causes Ender 3’s print to have gaps or holes?
If your Ender 3’s print has gaps or holes, it’s usually an indication of under-extrusion. Under-extrusion occurs when the printer is not extruding enough filament, resulting in gaps or holes in the print. One of the common reasons for under-extrusion is a clogged nozzle or filament jam. When the filament is unable to move through the nozzle smoothly, it can cause under-extrusion.
To fix the issue, the first step is to check the nozzle for any clogs or filament jams. If there is a clog, the nozzle needs to be cleaned or replaced. It’s also important to ensure that the filament is loaded correctly and is not tangled or caught on any part of the printer. Additionally, it’s recommended to check the extruder gear to ensure that it’s not loose or damaged. If it is, it may need to be tightened or replaced.
Another solution is to adjust the extruder motor current. The extruder motor current determines the amount of power that the motor receives, and if it’s set too low, it can cause under-extrusion. To adjust the extruder motor current, the printer’s firmware settings need to be modified. This process can vary depending on the printer model and firmware used, so it’s recommended to refer to the printer manual or online resources for guidance.
It’s also important to check the print settings. The print settings can affect the extrusion rate, and if the settings are incorrect, it can cause under-extrusion. It’s recommended to ensure that the print settings are appropriate for the filament being used and that the extrusion rate is set correctly.
If none of the above solutions work, it’s possible that the extruder motor or driver is faulty and needs to be replaced. It’s recommended to contact the manufacturer or a professional technician to diagnose and fix the issue to avoid any further damage to the printer.
28. Why is my Ender 3’s print speed too slow or too fast?
If your Ender 3’s print speed is too slow or too fast, it could be due to several reasons. One of the common reasons is incorrect print settings. If the print settings are not appropriate for the filament being used or the model being printed, it can cause the print speed to be too slow or too fast. Another possible reason is a faulty stepper driver or motor. If the stepper driver or motor is not functioning correctly, it can cause the printer to not respond to speed changes properly.
To fix the issue, the first step is to check the print settings. The print settings should be checked to ensure that they are appropriate for the filament being used and the model being printed. It’s recommended to refer to the printer manual or online resources for guidance on how to adjust the print settings. Additionally, it’s important to ensure that the print speed is set to a suitable level. If the print speed is too slow or too fast, it can affect the quality of the print.
Another solution is to adjust the stepper motor current. The stepper motor current determines the amount of power that the motor receives, and if it’s set too low, it can cause the printer to not respond to speed changes properly. To adjust the stepper motor current, the printer’s firmware settings need to be modified. This process can vary depending on the printer model and firmware used, so it’s recommended to refer to the printer manual or online resources for guidance.
If none of the above solutions work, it’s possible that the stepper driver or motor is faulty and needs to be replaced. It’s recommended to contact the manufacturer or a professional technician to diagnose and fix the issue to avoid any further damage to the printer.
29. How can I fix Ender 3’s sudden power loss or reboot?
If your Ender 3 is experiencing sudden power loss or reboot, it could be due to several reasons. One of the common reasons is a loose or damaged power cable. If the power cable is not making proper contact with the printer or is damaged, it can cause the printer to lose power or reboot unexpectedly. Another possible reason is a faulty power supply unit. If the power supply unit is not functioning correctly, it can cause the printer to lose power or reboot unexpectedly.
To fix the issue, the first step is to check the power cable connection. The connection should be checked for any signs of damage or looseness, and if any issues are found, the cable may need to be replaced. It’s also important to ensure that the cable is plugged in securely to the printer and the power outlet. Additionally, it’s recommended to try using a different power outlet to confirm whether the issue is with the printer or the power outlet.
Another solution is to check the power supply unit. The power supply unit should be checked to ensure that it’s functioning correctly and providing the correct voltage to the printer. If the power supply unit is faulty, it may need to be repaired or replaced.
It’s also important to check the printer’s firmware settings. Sometimes, the power loss or reboot issue may be due to incorrect firmware settings. In this case, the firmware settings need to be checked and modified if necessary. It’s recommended to refer to the printer manual or online resources for guidance on how to modify the firmware settings.
If none of the above solutions work, it’s possible that there is a hardware issue with the printer. It’s recommended to contact the manufacturer or a professional technician to diagnose and fix the issue to avoid any further damage to the printer.
30. What causes Ender 3’s filament tangling or jamming?
If your Ender 3’s filament is tangling or jamming, it’s usually an indication of a problem with the filament feed. One of the common reasons for this issue is a clogged nozzle or filament jam. When the filament is unable to move through the nozzle smoothly, it can cause the filament to tangle or jam. Another possible reason is a loose or damaged extruder gear. If the gear is not making proper contact with the filament, it can cause the motor to skip steps and result in filament tangling or jamming.
To fix the issue, the first step is to check the nozzle for any clogs or filament jams. If there is a clog, the nozzle needs to be cleaned or replaced. It’s also important to ensure that the filament is loaded correctly and is not tangled or caught on any part of the printer. Additionally, it’s recommended to check the extruder gear to ensure that it’s not loose or damaged. If it is, it may need to be tightened or replaced.
Another solution is to adjust the extruder motor current. The extruder motor current determines the amount of power that the motor receives, and if it’s set too high, it can cause the motor to overheat and cause filament tangling or jamming. To adjust the extruder motor current, the printer’s firmware settings need to be modified. This process can vary depending on the printer model and firmware used, so it’s recommended to refer to the printer manual or online resources for guidance.
It’s also important to check the print settings. The print settings can affect the extrusion rate, and if the settings are incorrect, it can cause filament tangling or jamming. It’s recommended to ensure that the print settings are appropriate for the filament being used and that the extrusion rate is set correctly.
If none of the above solutions work, it’s possible that the extruder motor or driver is faulty and needs to be replaced. It’s recommended to contact the manufacturer or a professional technician to diagnose and fix the issue to avoid any further damage to the printer.
31. Why is my Ender 3’s print surface rough or uneven?
There can be several reasons why the print surface on your Ender 3 is rough or uneven. One common reason is that the bed is not level. This can cause the nozzle to be too close or too far from the bed, resulting in an uneven print surface. Another reason could be an issue with the build plate itself. If the build plate is warped or damaged, it can cause the print surface to be rough or uneven. In some cases, the roughness may be caused by the type of filament being used. Some filaments, such as ABS, tend to warp or shrink during printing, which can cause an uneven surface.
To resolve this issue, start by checking the levelness of your bed. Use a sheet of paper to adjust the distance between the nozzle and the bed until the paper can move with slight resistance. If the bed is still not level, adjust the leveling screws until it is. If the issue persists, check the build plate for any damage or warping. If the build plate is damaged, consider replacing it with a new one. You can also try using a different filament to see if that improves the print surface.
32. How can I resolve Ender 3’s weak infill or top layer issues?
Weak infill or top layers on your Ender 3 prints can be caused by a few different factors. One possible reason is that the printer is underextruding, meaning that not enough filament is being extruded during printing. Another possible reason is that the print temperature is too low, causing the filament to not properly melt and bond together.
To resolve weak infill or top layer issues, first check that your extruder is properly calibrated and that the filament is properly loaded into the printer. You can also try adjusting the print temperature to see if that improves the print quality. Increasing the temperature by a few degrees may help improve the bonding of the filament. Additionally, adjusting the print speed or increasing the infill density can also help improve the strength of the print.
If these steps do not resolve the issue, consider checking the nozzle for any clogs or blockages. A clogged nozzle can cause underextrusion and weaken the infill and top layers of your prints. Finally, if the problem persists, you may need to replace your extruder or nozzle.
33. What causes Ender 3’s parts to have poor adhesion or delamination?
Poor adhesion or delamination of parts on your Ender 3 can be caused by several factors. One common reason is that the print bed is not properly leveled or that the surface is not clean. If the bed is not level, the nozzle may not be close enough to the bed, causing poor adhesion. If the bed is not clean, the print may not properly stick to the surface. Another possible reason is that the print temperature is too low, causing the filament to not properly bond together.
To improve adhesion, start by ensuring that your bed is properly leveled and that the surface is clean. You can also try using a build surface such as a glass bed or a BuildTak sheet to improve adhesion. Additionally, increasing the print temperature or adjusting the fan settings can also help improve adhesion. If the issue persists, try adjusting the print speed or increasing the infill density to improve the bonding of the filament.
If these steps do not resolve the issue, consider checking the nozzle for any clogs or blockages. A clogged nozzle can cause underextrusion and weaken the adhesion of the print. Finally, if the problem persists, you may need to replace your extruder or nozzle.
34. Why is my Ender 3’s print head vibrating or shaking?
A vibrating or shaking print head on your Ender 3 can be caused by several factors. One possible reason is that the printer is running at a high speed, causing the print head to vibrate. Another possible reason is that the print bed is not properly leveled, causing the print head to move unevenly. Additionally, a loose belt or misaligned axes can also cause the print head to vibrate or shake.
To resolve this issue, start by checking the levelness of your bed and adjusting the leveling screws if necessary. You can also try reducing the print speed to see if that reduces the vibration. Check the belts and axes to make sure they are properly tightened and aligned. If the issue persists, consider adding additional support to the printer frame to reduce any movement or vibration during printing.
35. How can I fix Ender 3’s “EEPROM CRC mismatch” error?
An “EEPROM CRC mismatch” error on your Ender 3 can occur when the firmware settings stored in the printer’s EEPROM do not match the settings in the firmware. This can happen when the firmware has been updated or when the printer has been modified.
To fix this error, you will need to reset the EEPROM settings. This can be done through the printer’s control panel or through a program such as Pronterface. In Pronterface, connect to the printer and enter the command “M502” followed by “M500”. This will reset the EEPROM settings to the default values and save them to the firmware. Once this is done, power cycle the printer and the error should be resolved.
36. What causes Ender 3’s “homing failed” or “endstop not triggered” errors?
“Homing failed” or “endstop not triggered” errors on your Ender 3 can occur when the printer is unable to properly detect the endstop during the homing process. This can be caused by a few different factors, such as a loose or damaged endstop switch, a misaligned print bed, or incorrect firmware settings.
To resolve this issue, start by checking the endstop switch to make sure it is properly aligned and not damaged. Check the wiring to ensure that it is properly connected and not damaged. You can also try adjusting the firmware settings to ensure that the printer is properly configured for your specific endstop.
If the issue persists, consider replacing the endstop switch or adjusting the position of the print bed to ensure that it is properly aligned with the endstop. Finally, if none of these steps resolve the issue, you may need to replace the control board.
37. Why is my Ender 3’s filament not feeding properly?
If your Ender 3 is experiencing issues with filament feeding, it could be caused by several factors. One possible reason is that the extruder is clogged or blocked, preventing the filament from properly feeding into the printer. Another possible reason is that the filament is tangled or not spooled properly, causing it to become stuck in the extruder.
To resolve this issue, start by checking the extruder for any clogs or blockages. You can do this by removing the filament and inspecting the nozzle and the extruder gear for any obstructions. If you find a clog, you can try cleaning it using a needle or by performing a cold pull.
If the extruder is not clogged, check the spool of filament to ensure that it is properly spooled and not tangled. You can also try adjusting the tension on the extruder gear to improve the grip on the filament. Finally, try feeding the filament manually through the extruder to ensure that it is properly seated and feeding correctly.
If none of these steps resolve the issue, consider replacing the extruder gear or nozzle. You can also try using a different brand or type of filament to see if that improves the feeding issues.
38. How can I resolve Ender 3’s blobbing or zits on prints?
Blobbing or zits on your Ender 3 prints can be caused by several factors. One possible reason is that the print temperature is too high, causing excess filament to be extruded and forming blobs. Another possible reason is that the retraction settings are not properly configured, causing excess filament to be left on the print surface.
To resolve this issue, start by adjusting the print temperature to a lower setting. You can also try adjusting the retraction settings to reduce the amount of filament being extruded. Additionally, increasing the cooling fan speed can also help prevent blobs and zits from forming.
If the issue persists, consider adjusting the print speed or increasing the infill density to improve the bonding of the filament. You can also try adjusting the z-axis offset to ensure that the nozzle is properly positioned during printing.
39. What causes Ender 3’s bowden tube to pop out or slip?
The bowden tube on your Ender 3 can pop out or slip for several reasons. One possible reason is that the tube is not properly seated in the extruder or hot end, causing it to come loose during printing. Another possible reason is that the tube is damaged or worn, causing it to lose its grip on the filament.
To resolve this issue, start by checking the bowden tube to ensure that it is properly seated in both the extruder and the hot end. You can also try replacing the tube to ensure that it is not damaged or worn. Additionally, you can try adjusting the tension on the extruder gear to ensure that it is properly gripping the filament.
If the issue persists, consider upgrading to a higher-quality bowden tube or adjusting the print settings to reduce the stress on the tube during printing. Finally, make sure to regularly inspect the bowden tube for any signs of wear or damage.
40. Why is my Ender 3’s bed wobbling or rocking?
A wobbling or rocking bed on your Ender 3 can be caused by several factors. One possible reason is that the bed is not properly leveled or that the leveling screws are loose. Another possible reason is that the bearings or rollers on the bed are damaged or worn.
To resolve this issue, start by checking the levelness of your bed and adjusting the leveling screws if necessary. Check the bearings and rollers on the bed to ensure that they are not damaged or worn. You can also try adding additional support to the bed to prevent it from wobbling during printing.
If the issue persists, consider upgrading to a higher-quality bed or adding a stabilizer to the printer frame to reduce any movement or vibration during printing. Finally, make sure to regularly maintain and inspect the printer components to ensure optimal performance.
*****
41. How can I fix Ender 3’s bent or warped rods?
If your Ender 3’s rods are bent or warped, you might experience issues with print quality or accuracy. The first step in fixing this issue is to identify which rods are affected. You can do this by manually moving the print head and observing any wobbling or vibration. Once you have identified the problematic rods, you can try to straighten them using a rod straightening tool or by gently applying pressure.
If the rods are severely bent or warped, it might be necessary to replace them altogether. You can purchase replacement rods from various online retailers or directly from the manufacturer. Once you have the new rods, you can easily install them by following these steps:
- Turn off the printer and unplug it from the power source.
- Remove the bed and the print head assembly.
- Unscrew the old rods from the printer frame.
- Insert the new rods and secure them with the screws.
- Reattach the print head assembly and the bed.
- Turn on the printer and calibrate it.
It’s important to note that replacing the rods might affect the printer’s overall performance, so it’s recommended to calibrate the printer after the replacement process.
42. What causes Ender 3’s X-axis or Y-axis belt tension issues?
The Ender 3’s X-axis and Y-axis belts are responsible for moving the print head and bed during printing. If these belts are loose or have tension issues, it can result in poor print quality or even failed prints. Here are some possible causes of belt tension issues and how to fix them:
- Loose belt: If the belt is loose, it can cause slipping or uneven movement of the print head or bed. To fix this issue, you can tighten the belt using the tension adjustment screws on the printer frame.
- Worn belt: Over time, the belt can become worn or stretched, which can affect its tension. If this is the case, it’s recommended to replace the belt altogether. You can purchase replacement belts from various online retailers or directly from the manufacturer.
- Misaligned pulleys: If the pulleys that guide the belt are misaligned, it can cause tension issues. To fix this, you can adjust the pulleys using the screws that secure them to the printer frame.
- Damaged belt teeth: If the teeth on the belt are damaged, it can affect its grip on the pulleys and cause tension issues. To fix this, you’ll need to replace the belt.
It’s important to ensure that the belts are properly tensioned and aligned to ensure smooth and accurate movement during printing.
43. Why is my Ender 3’s part cooling fan not working?
The part cooling fan on the Ender 3 is responsible for cooling the filament as it exits the hotend, which helps prevent stringing and other print defects. If the part cooling fan is not working, it can cause issues such as poor print quality or failed prints. Here are some possible causes of a non-working part cooling fan and how to fix them:
- Loose or damaged wiring: Check the wires that connect the part cooling fan to the printer’s control board to ensure they are properly connected and not damaged. If the wires are loose or damaged, it can cause the fan to not work.
- Faulty fan: If the fan is faulty, it might not spin or provide enough airflow. You can test the fan by disconnecting it from the printer and connecting it to a different power source to see if it spins correctly. If it doesn’t, it’s recommended to replace the fan.
- Fan speed settings: Make sure that the fan speed settings in your print file or on the printer’s control panel are correct for the type of filament you’re using. Incorrect fan speed settings can cause the part cooling fan to not work.
- Firmware issues: Sometimes, firmware issues can cause the part cooling fan to not work. Try updating the printer’s firmware to the latest version to see if it resolves the issue.
- Fan shroud obstruction: If there is debris or filament obstructing the fan shroud, it can prevent the part cooling fan from working properly. Remove any debris or filament from the shroud to fix this issue.
It’s important to ensure that the part cooling fan is properly functioning to ensure successful and high-quality prints.
44. How can I resolve Ender 3’s SD card read or write errors?
SD card read or write errors on the Ender 3 can be frustrating, especially when trying to print a file. Here are some possible causes of SD card errors and how to fix them:
- Corrupted SD card: If the SD card is corrupted, it can cause read or write errors. Try using a different SD card to see if the issue persists.
- SD card compatibility: The Ender 3 might have issues reading or writing to certain types of SD cards. Try using a different brand or type of SD card to see if the issue is resolved.
- File formatting: Make sure that the file you are trying to print is in the correct format and is compatible with the printer. The Ender 3 can only read files in the .gcode format.
- Firmware update: Updating the printer’s firmware can sometimes fix SD card read or write errors. You can download the latest firmware from the manufacturer’s website and follow the instructions to install it.
- SD card slot issues: If the SD card slot on the printer is dirty or damaged, it can cause read or write errors. Try cleaning the slot with a soft brush or compressed air. If the slot is damaged, it might be necessary to replace the printer’s control board.
If none of these solutions work, it’s recommended to contact the manufacturer or a professional technician for further assistance.
45. What causes Ender 3’s print head to crash into the bed?
A print head crashing into the bed on the Ender 3 can cause damage to the printer and can be dangerous. Here are some possible causes of this issue and how to fix them:
- Incorrect bed leveling: If the bed is not level, it can cause the print head to crash into the bed during printing. Make sure to level the bed properly before starting a print.
- Incorrect print head height: If the print head is too low or too high, it can cause it to crash into the bed. Make sure to adjust the print head height before starting a print.
- Loose or damaged belts: If the X-axis or Y-axis belts are loose or damaged, it can cause the print head to move incorrectly and crash into the bed. Check the belts and tighten or replace them if necessary.
- Loose or damaged pulleys: If the pulleys that guide the belts are loose or damaged, it can cause the print head to move incorrectly and crash into the bed. Check the pulleys and tighten or replace them if necessary.
- Incorrect print settings: If the print settings are incorrect, such as the print bed size or print head movement speed, it can cause the print head to move incorrectly and crash into the bed. Double-check the print settings before starting a print.
It’s important to ensure that the printer is properly calibrated and maintained to prevent issues such as print head crashes.
46. Why is my Ender 3’s extruder gear wearing down or slipping?
The extruder gear on the Ender 3 is responsible for feeding filament into the hotend during printing. If the gear is worn down or slipping, it can cause issues such as under-extrusion or failed prints. Here are some possible causes of extruder gear wear or slippage and how to fix them:
- Worn gear: Over time, the gear can become worn down due to constant use. If this is the case, it’s recommended to replace the gear. You can purchase replacement gears from various online retailers or directly from the manufacturer.
- Filament debris: If there is debris or small particles of filament stuck in the extruder gear, it can cause the gear to slip or wear down faster. To fix this, you can remove the extruder assembly and clean the gear with a soft brush or compressed air.
- Incorrect tension: If the tension on the extruder gear is too high or too low, it can cause the gear to slip or wear down faster. Make sure to adjust the tension using the tension adjustment screw on the extruder assembly.
- Incorrect filament diameter: If the filament diameter is incorrect, it can cause the extruder gear to slip or wear down faster. Make sure to use filament with the correct diameter and adjust the extruder’s steps per mm accordingly.
- Faulty extruder motor: If the extruder motor is faulty, it might not provide enough torque to properly drive the extruder gear. You can test the motor by disconnecting it from the extruder assembly and connecting it to a different power source to see if it spins correctly. If it doesn’t, it’s recommended to replace the motor.
It’s important to ensure that the extruder gear is properly maintained and functioning to ensure smooth and accurate filament feeding during printing.
47. How can I resolve Ender 3’s “heating failed” error?
If you’re experiencing a “heating failed” error on your Ender 3, it means that the printer was unable to heat the hotend or bed to the desired temperature. Here are some possible causes of this error and how to fix them:
- Loose or damaged wires: Check the wires that connect the hotend or bed to the printer’s control board to ensure they are properly connected and not damaged. If the wires are loose or damaged, it can cause the heating failed error.
- Faulty thermistor: The thermistor is responsible for measuring the temperature of the hotend or bed. If the thermistor is faulty, it might provide inaccurate readings and cause the heating failed error. You can test the thermistor using a multimeter and replace it if necessary.
- Incorrect temperature settings: Make sure that the temperature settings in your print file or on the printer’s control panel are correct for the type of filament you’re using. Incorrect temperature settings can cause the heating failed error.
- Clogged nozzle: If the nozzle is clogged, it can prevent the hotend from heating up properly and cause the heating failed error. To fix this, you can try to unclog the nozzle using a needle or specialized cleaning filament.
- Insufficient power supply: If the printer’s power supply is insufficient, it might not provide enough power to heat the hotend or bed to the desired temperature. Make sure that the power supply is providing the correct voltage and wattage for your printer.
It’s important to ensure that the hotend and bed are properly heated to ensure successful and high-quality prints.
48. What causes Ender 3’s hotend assembly to become loose or wobbly?
If the hotend assembly on your Ender 3 becomes loose or wobbly, it can cause issues such as poor print quality or failed prints. Here are some possible causes of a loose or wobbly hotend assembly and how to fix them:
- Loose screws: Check the screws that secure the hotend assembly to the printer frame to ensure they are tight. If the screws are loose, it can cause the hotend assembly to wobble.
- Damaged or worn bearings: If the bearings that guide the hotend assembly are damaged or worn, it can cause the hotend assembly to wobble. Check the bearings and replace them if necessary.
- Misaligned hotend assembly: If the hotend assembly is not aligned correctly with the printer frame, it can cause it to wobble. Make sure that the hotend assembly is properly aligned and adjusted before starting a print.
- Damaged hotend or hotend mount: If the hotend or hotend mount is damaged, it can cause the hotend assembly to wobble. Check the hotend and mount for any signs of damage and replace them if necessary.
- Loose PTFE tube: If the PTFE tube that guides the filament through the hotend is loose, it can cause the hotend assembly to wobble. Check the PTFE tube and ensure that it is properly secured in the hotend and extruder.
It’s important to ensure that the hotend assembly is properly secured and functioning to ensure successful and high-quality prints.
49. Why is my Ender 3’s PTFE tube discolored or burnt?
The PTFE tube on the Ender 3 is responsible for guiding the filament through the hotend during printing. If the PTFE tube is discolored or burnt, it can affect filament flow and cause issues such as under-extrusion or clogs. Here are some possible causes of a discolored or burnt PTFE tube and how to fix them:
- Overheating: If the hotend temperature is set too high or if the printer is printing at a high speed, it can cause the filament to overheat and melt the PTFE tube. Make sure to adjust the hotend temperature and print speed settings accordingly.
- Clogged nozzle: If the nozzle is clogged, it can cause filament to build up in the PTFE tube and melt it. To fix this, you can try to unclog the nozzle using a needle or specialized cleaning filament.
- Damaged PTFE tube: Over time, the PTFE tube can become worn or damaged, which can cause it to discolor or burn. If this is the case, it’s recommended to replace the PTFE tube altogether. You can purchase replacement tubes from various online retailers or directly from the manufacturer.
- Filament type: Certain types of filament, such as ABS, can produce fumes that can cause the PTFE tube to discolor or burn. Make sure to use filament types that are compatible with the PTFE tube.
- Incorrect installation: If the PTFE tube is not installed correctly, it can cause it to melt or burn. Make sure to properly install the PTFE tube and ensure that it is properly secured in the hotend and extruder.
It’s important to ensure that the PTFE tube is properly maintained and functioning to ensure smooth and accurate filament feeding during printing.
50. How can I fix Ender 3’s loose or wobbly pulley and bearing assemblies?
Loose or wobbly pulley and bearing assemblies on the Ender 3 can cause issues such as poor print quality or failed prints. Here are some possible causes of loose or wobbly pulley and bearing assemblies and how to fix them:
- Loose screws: Check the screws that secure the pulleys and bearings to the printer frame to ensure they are tight. If the screws are loose, it can cause the pulley and bearing assemblies to wobble.
- Damaged or worn bearings: If the bearings that guide the pulleys are damaged or worn, it can cause the pulley and bearing assemblies to wobble. Check the bearings and replace them if necessary.
- Misaligned pulleys: If the pulleys that guide the belts are not aligned correctly, it can cause the pulley and bearing assemblies to wobble. Make sure that the pulleys are properly aligned and adjusted before starting a print.
- Damaged pulley or belt: If the pulley or belt is damaged, it can cause the pulley and bearing assemblies to wobble. Check the pulley and belt for any signs of damage and replace them if necessary.
- Loose belt tension: If the belt tension is too loose, it can cause the pulley and bearing assemblies to wobble. Make sure to adjust the belt tension using the tension adjustment screws on the printer frame.
It’s important to ensure that the pulley and bearing assemblies are properly secured and functioning to ensure successful and high-quality prints. Regular maintenance and inspection can help prevent issues such as loose or wobbly assemblies.
If none of these solutions work, it’s recommended to contact the manufacturer or a professional technician for further assistance.
Conclusion
The Ender 3 is a reliable and affordable 3D printer that can produce high-quality prints with proper maintenance and troubleshooting. The Ender 3 is a popular and reliable 3D printer, but it’s not immune to issues and errors.
By properly maintaining and troubleshooting the printer, you can ensure successful and high-quality prints. Remember to always follow proper safety procedures when working with the printer and its components.
By following the solutions and tips provided in this guide, you’ll be able to overcome common issues and achieve successful prints with your Ender 3. Remember to always follow proper safety procedures when working with the printer and its components, and enjoy the endless possibilities of 3D printing.