In the world of architectural design and modeling, precise control over associated levels is crucial for creating accurate and organized building models. Autodesk Revit, a leading software in the industry, provides robust tools for managing and modifying associated levels within projects. Understanding how to change associated levels in Revit is a fundamental skill that empowers architects, engineers, and designers to maintain consistency and alignment in their models. In this article, we will explore the process of changing associated levels in Revit, along with best practices and tips for efficient level management.
Key Takeaways
- Changing associated levels in Revit allows for accurate positioning and alignment of elements within a building model.
- Elements can be associated with levels in Revit, either as hosted or associated elements.
- The process of changing associated levels involves selecting the element, accessing its properties, and modifying the associated level parameter.
- Best practices for changing associated levels include planning ahead, utilizing filters and selection sets, maintaining consistency, understanding element behavior, and fostering effective collaboration and communication.
Changing Associated Level: A Key Concept in Revit
When working with Revit, levels serve as reference planes that define the height and position of various elements within a building model. By associating elements with specific levels, you ensure that they are accurately positioned in relation to other elements in the project. Changing the associated level of an element involves relocating it vertically in the model, and it is a critical operation in maintaining the overall integrity and accuracy of the design.
Understanding Element Associations in Revit
Before diving into the process of changing associated levels, it is important to grasp the concept of element associations in Revit. In Revit, elements can have different relationships with levels, including being hosted by a level or associated with a level. Hosted elements are physically placed on a level, such as walls or floors. On the other hand, associated elements are positioned relative to a level, but they are not physically hosted by it. This distinction is crucial to understanding how elements behave when their associated levels are modified.
The Process of Changing Associated Levels
To change the associated level of an element in Revit, follow these steps:
- Select the element: Start by selecting the element or elements whose associated levels you wish to change. This can be done by using the selection tools available in Revit or by simply clicking on the desired element.
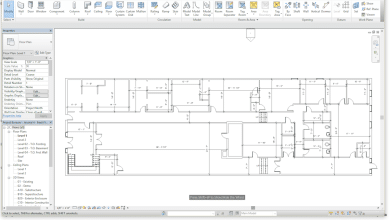
- Access the Properties palette: Once the element is selected, locate the Properties palette in the Revit interface. The Properties palette provides access to various properties and parameters of the selected element.
- Locate the “Level” property: In the Properties palette, search for the “Level” property. This property determines the associated level of the selected element.
- Change the associated level: Click on the dropdown menu next to the “Level” property and select the desired level from the available options. Revit provides a list of all the levels present in the project, allowing you to choose the appropriate one for the element.
- Confirm the changes: After selecting the new associated level, click on the “OK” or “Apply” button in the Properties palette to confirm the changes. The element will now be associated with the newly chosen level.
Best Practices for Changing Associated Levels
To ensure a smooth workflow and maintain model accuracy when changing associated levels in Revit, consider the following best practices:
- Plan ahead: Before making any changes to associated levels, it is crucial to plan and visualize the desired outcome. Review the project requirements and consider the implications of modifying the associated levels of different elements.
- Use filters and selection sets: Revit offers powerful filtering and selection set features that allow you to target specific elements based on their properties. Utilize these tools to efficiently select and modify groups of elements with similar associated levels.
- Maintain consistency: Consistency is key when working with associated levels. Aim to maintain a logical hierarchy and uniformity in your model by ensuring that elements on the same level are associated accordingly.
- Understand element behavior: Changing the associated level of an element may impact its position and relationships with other elements. Take the time to understand how the modifications will affect the overall model and make any necessary adjustments.
- Collaborate and communicate: If you are working in a team environment, ensure effective collaboration and communication regarding changes to associated levels. Document any modifications made and communicate them to your team members to maintain consistency and avoid any conflicts or discrepancies in the model.
Troubleshooting Common Issues
While changing associated levels in Revit is generally straightforward, there are a few common issues that you may encounter. Here are some troubleshooting tips:
- Disconnected elements: When changing associated levels, some elements may become disconnected or appear out of place. To resolve this, check if the element is hosted by the correct level or if any constraints need adjustment.
- Inconsistent element behavior: In certain cases, changing the associated level may not yield the expected results, such as elements not moving vertically as intended. Double-check the constraints and relationships of the element to identify any conflicting settings that may be causing the issue.
- Linked files and associated levels: When working with linked files in Revit, changing the associated level of an element may require corresponding changes in the linked file as well. Ensure that you coordinate with other project collaborators to make the necessary adjustments in both the host and linked files.
Additional Resources and Further Learning
Revit offers a vast array of tools and functionalities for managing associated levels and creating accurate building models. To further enhance your knowledge and skills in this area, consider exploring the following resources:
- Autodesk Revit documentation: The official documentation provided by Autodesk offers comprehensive guides and tutorials on various topics, including working with levels and associated elements.
- Online tutorials and courses: Numerous online platforms provide video tutorials and courses specifically tailored to learning Revit. These resources can help you deepen your understanding of associated levels and gain practical insights into their management.
- Community forums and discussions: Engaging in Revit user communities, such as forums and discussion boards, can provide valuable insights and solutions to specific issues related to associated levels. Share your experiences and learn from the collective knowledge of the community.
FAQ: Changing Associated Levels in Revit
1. Can you change the associated level in Revit?
Yes, it is possible to change the associated level of elements in Revit. By following the steps outlined in the article, you can select an element, access its properties, and modify the associated level parameter to assign a new level. This allows you to reposition the element vertically within the building model.
2. How do I change the level of an association in Revit?
To change the level of an association in Revit, follow these steps:
- Select the element whose level you want to change.
- Locate the “Level” property in the Properties palette.
- Click on the dropdown menu next to the “Level” property.
- Choose the desired level from the available options.
- Confirm the changes by clicking the “OK” or “Apply” button in the Properties palette.
By following these steps, you can effectively modify the associated level of an element in Revit.
3. How do you associate a level to a floor plan in Revit?
Associating a level to a floor plan in Revit is done automatically when creating the floor plan view. When you create a floor plan view, Revit prompts you to select the desired level for the floor plan. By choosing the appropriate level, the floor plan view becomes associated with that specific level, and any elements placed within the view will be positioned accordingly.
To create a floor plan view and associate it with a level, follow these steps:
- Open the desired project in Revit.
- Navigate to the View tab in the ribbon menu.
- Click on the Floor Plan button and select the desired floor plan type.
- Revit will prompt you to select the level for the floor plan.
- Choose the appropriate level from the list.
- Click OK to create the floor plan view and associate it with the selected level.
This process ensures that the floor plan view is accurately aligned with the chosen level in Revit.
4. What is the reference level in Revit?
In Revit, the reference level is a fundamental component used to establish the height and position of various elements within a building model. It serves as a vertical reference plane, typically represented by a dashed line, and defines a baseline for other elements within the project.
Reference levels are commonly used for creating and aligning elements such as walls, floors, ceilings, and structural components. They provide a consistent and coordinated reference for designing and modeling in Revit.
5. How do I change family level in Revit?
To change the level of a family in Revit, follow these steps:
- Select the family instance or type that you want to modify.
- Access the Properties palette.
- Locate the “Level” property, which determines the associated level of the family.
- Click on the dropdown menu next to the “Level” property.
- Choose the desired level from the available options.
- Confirm the changes by clicking the “OK” or “Apply” button in the Properties palette.
By following these steps, you can change the associated level of a family in Revit, effectively repositioning it within the project.
6. How do you control levels in Revit?
Controlling levels in Revit involves managing their properties, relationships, and hierarchy within the building model. To control levels effectively, consider the following actions:
- Create levels: Use the “Level” tool in the ribbon menu to create new levels within the project.
- Modify levels: Access the level properties to adjust their names, elevations, and other parameters as needed.
- Associate elements: Use the “Level” property to associate elements with the appropriate level, ensuring accurate positioning within the model.
- Organize levels: Utilize the “Manage Levels” feature to reorder levels, create level groups, or adjust their display settings to enhance the clarity and organization of your model.
- Coordinate with linked files: If your project includes linked files, ensure that levels are coordinated between the host file and the linked files to maintain consistency and accuracy throughout the design.
By effectively controlling levels in Revit, you can maintain a well-structured and organized building model.
7. How do I change associate family parameters in Revit?
To change associated family parameters in Revit, follow these steps:
- Select the family instance or type that you want to modify.
- Access the Properties palette.
- Locate the parameter you wish to change and modify its value or select a different option from the available choices.
- Confirm the changes by clicking the “OK” or “Apply” button in the Properties palette.
By following these steps, you can modify associated family parameters in Revit, allowing for customization and fine-tuning of the family’s behavior and appearance.
8. How do I change the reference level of structural framing in Revit?
To change the reference level of structural framing elements in Revit, such as beams or columns, you can use the following procedure:
- Select the structural framing element that you want to modify.
- Access the Properties palette.
- Locate the “Reference Level” property.
- Click on the dropdown menu next to the “Reference Level” property.
- Choose the desired level from the available options.
- Confirm the changes by clicking the “OK” or “Apply” button in the Properties palette.
By changing the reference level of structural framing elements, you can ensure accurate positioning and alignment within the project.
9. How do I change the survey level in Revit?
To change the survey level in Revit, follow these steps:
- Open the project in Revit.
- Navigate to the Manage tab in the ribbon menu.
- Click on the “Project Location” button to access the project location settings.
- In the Project Location dialog box, locate the “Survey Point” section.
- Click on the “Move” button to adjust the survey point’s position.
- Specify the new coordinates or select a new location using the available options.
- Click OK to confirm the changes and update the survey level in Revit.
By adjusting the survey point, you can change the survey level and ensure accurate positioning of the project within its real-world context.
10. How do you change a level to ground floor in Revit?
In Revit, the terminology used for the ground floor may vary depending on the project template or regional standards. However, you can easily change the level representing the ground floor by following these general steps:
- Select the level that represents the current ground floor.
- Access the level properties in the Properties palette.
- Modify the level name to reflect the desired designation, such as “Ground Floor.”
- Confirm the changes, and the level will be updated accordingly.
By adjusting the level name, you can change a level to represent the ground floor in Revit, aligning it with your project requirements.
11. How do you group levels in Revit?
In Revit, you can group levels together to create a logical hierarchy and simplify the organization of your building model. To group levels, follow these steps:
- Open the project in Revit.
- Navigate to the Manage tab in the ribbon menu.
- Click on the “Level” button to access the Manage Levels dialog box.
- In the Manage Levels dialog box, select the levels you want to group.
- Click on the “Group” button to create a level group.
- Give the group a meaningful name to reflect the purpose or category of the levels being grouped.
- Click OK to confirm the creation of the level group.
By grouping levels together, you can easily manage and navigate through your building model, especially when dealing with complex projects that have multiple levels.
12. What is the difference between blue and black levels in Revit?
In Revit, the colors blue and black are used to differentiate between two types of levels: normal levels and reference levels.
- Normal levels: Normal levels in Revit are displayed as blue lines. They represent the actual floor levels within the building, such as the ground floor, second floor, etc. Normal levels are typically associated with elements and act as the primary reference for positioning and aligning building components.
- Reference levels: Reference levels in Revit are displayed as black lines. They serve as additional vertical reference planes that are not associated with physical floor levels. Reference levels are often used for design purposes, such as creating sloped or stepped floor conditions, or as temporary references during the modeling process.
By using different colors, Revit visually distinguishes between normal levels (blue) and reference levels (black), providing clarity and ease of identification within the project.
13. What are level datums in Revit?
In Revit, level datums refer to horizontal reference lines used to establish consistent elevations throughout a building model. Level datums are often associated with floor levels and provide a baseline for aligning and coordinating elements within the project.
Level datums can be used to establish common heights for windows, doors, ceilings, and other building components. They ensure consistency and accuracy in the vertical positioning of elements across different views and disciplines within the Revit project.
By utilizing level datums, designers and modelers can maintain a coordinated and standardized approach to vertical design in their Revit projects.
14. What are reference levels?
Reference levels in Revit are additional horizontal planes used to create temporary or design-specific references within the building model. Unlike normal levels that represent physical floor levels, reference levels are not typically associated with physical elements.
Reference levels can be used to create temporary construction lines, establish vertical constraints, or aid in the creation of complex geometries. They offer flexibility and freedom in designing elements that may deviate from the standard floor levels.
By using reference levels strategically, designers can introduce unique design elements and achieve greater flexibility in their Revit projects.
15. What is the reference level for a variable?
In Revit, the reference level for a variable refers to the level that is used as the base reference for a particular variable or parameter. The reference level determines the starting point or baseline from which the variable is measured or calculated.
For example, in the case of a variable representing the height of a window above the floor, the reference level would be the level that represents the floor. The variable would then measure the distance from the floor level to determine the window’s height.
By establishing a reference level for variables, designers can accurately define and control the relationships and measurements within their Revit models.
16. How do you add a reference level in Revit?
To add a reference level in Revit, follow these steps:
- Open the project in Revit.
- Navigate to the Manage tab in the ribbon menu.
- Click on the “Level” button to access the Manage Levels dialog box.
- Click on the “New” button to create a new level.
- Specify the properties of the new level, such as its name and elevation.
- Choose “Reference” as the type of level.
- Click OK to confirm the creation of the reference level.
By following these steps, you can add a reference level in Revit. The newly created reference level will serve as a horizontal reference plane for design purposes, allowing you to establish additional references within your project.
17. How do I show all levels in Revit?
To show all levels in Revit and have them visible within the project, follow these steps:
- Open the project in Revit.
- Navigate to the View tab in the ribbon menu.
- In the Graphics panel, click on the “Visibility/Graphics” button.
- In the Visibility/Graphics Overrides dialog box, navigate to the “Model Categories” tab.
- Scroll down or use the search function to locate the “Levels” category.
- Make sure the checkbox next to “Levels” is checked to display all levels in the project.
- Click OK to apply the changes and show all levels in the current view.
Conclusion
Efficiently managing associated levels in Revit is crucial for maintaining accurate and well-organized building models. By understanding the concept of element associations, following the proper procedures, and implementing best practices, professionals can ensure precise positioning and alignment of elements within their projects. Remember to plan ahead, utilize the available tools and features, and communicate changes effectively to maintain consistency and accuracy. With a solid understanding of changing associated levels in Revit, architects, engineers, and designers can enhance their workflow and create high-quality building models that adhere to industry standards and project requirements.


