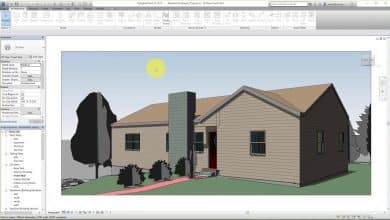
Creating a comprehensive site plan is a crucial aspect of the architectural and construction process. It provides an invaluable birds-eye view of a project, capturing the existing environment and the proposed development in unison. Autodesk Revit, with its powerful tools for building information modeling, is a preferred choice for professionals to create detailed and accurate site plans.
Revit allows architects and designers to create realistic and detailed site plans, considering various physical and environmental aspects such as topography, landscape, building placement, and more. The software provides tools to generate toposurfaces, place building pads, define property lines, and incorporate site components.
Key Takeaways
- Revit’s extensive toolset is perfect for generating detailed site plans.
- Toposurfaces, building pads, property lines, and site components enhance the site plan’s realism.
- Advanced tools like the Revit Site Designer plugin help shape the terrain.
- Adding details such as labels, annotations, color fills, and shadows enhances a site plan’s readability and presentation.
- Plugins like Twinmotion and Lumion can further improve the Revit experience.
How to Create a Site Plan in Revit
The site plan in Revit provides a bird’s eye view of your project, presenting essential details such as building placement, landscape elements, and site boundaries. Let’s start with the basics of creating a site plan.
1. Setup Your Project
Before creating a site plan, you need to ensure your Revit project is appropriately set up. Follow these steps:
- Open Autodesk Revit: Launch the software and choose the architectural template to start your project.
- Set Project Units: Navigate to the ‘Manage’ tab, click ‘Project Units’ and set the units according to your project requirements.
2. Import Your Site Context
If you have an existing site context, such as a CAD file, you can import it directly into Revit.
- Open Insert Tab: Click on ‘Insert’ from the top menu.
- Link CAD: Select the ‘Link CAD’ option.
- Choose Your File: Browse and select your site CAD file.
Remember to verify the correct positioning and scale of the imported file.
3. Create a Toposurface
Toposurfaces are essential to reflect the terrain and landscape accurately. Here are the steps to create a toposurface:
- Select ‘Massing & Site’ tab: This is where you’ll find the tools for toposurface creation.
- Choose ‘Toposurface’: Click on the ‘Toposurface’ tool.
- Insert Points: Insert elevation points on the grid to define your landform.
4. Building Pad
In the site plan, the building pad represents the area where the building will sit. To create a building pad:
- Go to the ‘Massing & Site’ tab: You will find the ‘Building Pad’ tool here.
- Create Boundary: Draw the boundary of your building pad on the toposurface.
5. Creating and Placing Site Components
Revit allows you to create and place various site components like trees, cars, people, and more.
- Go to the ‘Architecture’ tab: Click on the ‘Component’ tool.
- Select Component: Choose your desired site component.
- Place Component: Click to place the component on your site.
6. Property Lines
Property lines depict the boundaries of your project site. Here’s how to create them:
- Select ‘Massing & Site’ tab: The property line tool is located here.
- Select ‘Property Line’: Choose this tool.
- Define Property Line: Draw your property line on the toposurface.
Adjusting Your Site Plan View
After setting up your site plan, you need to adjust the view to make it presentable and informative.
To adjust the view range of your site plan, go to the ‘Properties’ panel on the left, scroll down to ‘View Range’, and click ‘Edit’. Here you can set the ‘Top’, ‘Cut Plane’, and ‘Bottom’ heights according to your needs.
View Scale
The ‘View Scale’ is located in the ‘Properties’ panel. Select the appropriate scale for your site plan. For instance, 1:200 is commonly used for site plans.
Orientation
The ‘Orientation’ option, found under the ‘Manage’ tab, allows you to set the project North for your site plan. This is essential for correctly interpreting sunlight and shadow conditions.
Detailing Your Site Plan in Revit
Once you have your site plan’s basics in place, it’s time to add details, which can significantly enhance the readability and presentation of your site plan.
Labels and Annotations
Annotations provide valuable information about the different elements in your site plan. To add annotations:
- Select the ‘Annotate’ tab: This tab contains all the tools necessary for annotating your plan.
- Choose the ‘Text’ tool: Click on this tool and then click on your site plan to start annotating.
Color Fill
Color fill can be used to represent different areas on your site plan. To use color fill:
- Select the ‘Analyze’ tab: Here you’ll find the ‘Color Fill’ tool.
- Choose the ‘Color Fill’ tool: Click on this tool, then click on your site plan.
- Select the ‘Legend Type’: Choose the appropriate legend for your color fill.
Shadows
Shadows provide depth and context to your site plan. To turn on shadows:
- Select ‘Graphic Display Options’: This can be found in the ‘View Control Bar’.
- Check ‘Shadows’: Click on ‘Shadows’ to turn them on.
Enhancing Your Site Plan in Revit with Plugins
To further optimize your workflow, several plugins can enhance your Revit experience. For example, Twinmotion provides real-time visualization and Lumion offers stunning rendering capabilities.
Remember that while plugins can offer powerful additional features, they also require additional learning and have system requirements to function smoothly.
As you explore creating site plans in Revit, you might encounter some challenges. Let’s tackle some common issues and their solutions.
1. Misaligned Imported CAD Files
Misalignment can occur when you import a CAD file to Revit. You should always check if the CAD file has been drawn and aligned correctly before importing. You can realign the CAD file in Revit by using the ‘Move’ command under the ‘Modify’ tab.
2. Irregular Toposurfaces
Creating toposurfaces may sometimes result in unexpected or irregular forms, often due to a high density of points or overlapping points. In such cases, try reducing the number of points or ensure there are no overlapping points.
3. Difficulty Placing Components on Toposurfaces
Sometimes, placing components such as trees or furniture on a toposurface can be challenging, especially on uneven terrain. You can overcome this by using the ‘Place on Face’ option when placing your components.
FAQ: How to create a site plan in Revit?
1. What is a Site Plan Drawing?
A site plan drawing is a detailed architectural plan that provides a bird’s-eye view of a given property or land area. It typically includes elements such as buildings, landscaping, parking, walkways, and other essential features found on the site. Site plans are critical in architectural and urban planning as they provide valuable insight into how a particular area’s physical characteristics interact with the structures built on it.
2. How do you Create a Site Plan?
Creating a site plan involves several steps depending on the tool you are using. Generally, you’ll start by setting up your project parameters, such as scale and units. Then, import any existing site context like a CAD file or satellite imagery. Once your context is set, create a toposurface to represent the existing landform. Add site elements such as building pads, property lines, and site components. Finally, adjust your view settings, annotate, and apply color fills or shadows for better visualization.
3. What is a Site Plan in Revit?
A site plan in Revit is a digital representation of a site layout, created using Revit’s powerful tools for architectural design. It allows architects and designers to model the built environment in a 3D context, considering real-world aspects like topography, site boundaries, building placement, and other landscape elements. This plan can then be used for various purposes such as design development, presentation, or permit application.
4. How to Create a Site Plan in Revit?
Creating a site plan in Revit involves several steps, starting with setting up your project. Then, you import an existing site context if available, and create a toposurface to represent the existing land. Next, you draw your building pad, property lines, and place site components. Finally, you adjust your site plan view, add details such as labels and annotations, and enhance your site plan using various Revit features and plugins.
5. How do you Create a Construction Plan in Revit?
Creating a construction plan in Revit involves defining the phases of construction. You start by setting up phasing in the project parameters, then define the existing and new construction phases. While creating your building components, specify the phase they belong to. Finally, you create phased views for different stages of the construction process, allowing you to visualize and present the construction sequence effectively.
6. How do you Create a Site Plan View in Revit?
In Revit, you create a site plan view by navigating to the ‘View’ tab, selecting ‘Plan Views’, and then ‘Site’. This will create a new site plan view based on the current level. You can adjust the scale and detail level of this view in the ‘Properties’ panel to suit your needs. You can also adjust the visibility settings to control which elements are displayed in this view.
7. What is Revit Site Designer?
Revit Site Designer is a plugin for Revit that offers advanced tools for shaping the terrain for building sites within the Revit environment. It allows architects, designers, and planners to model terrain for site analysis, create conceptual designs, visualize design intent, and iterate on the design to achieve the final layout.
8. How do I Create a Topo in Revit?
Creating a toposurface (or “topo”) in Revit involves using the ‘Toposurface’ tool under the ‘Massing & Site’ tab. After activating the tool, you insert points at different elevations on the grid to define the landform. Once you’ve added enough points, Revit will generate a 3D representation of the terrain based on these points.
In Revit, creating a floor plan level involves the use of the ‘Level’ tool located under the ‘Architecture’ tab. Click on the ‘Level’ tool and draw a level line in the side or section view of your model. This will create a new level and automatically generate a corresponding floor plan view. You can specify the height of the level in the ‘Properties’ panel.
10. How can I Import a CAD File into Revit?
To import a CAD file, navigate to the ‘Insert’ tab on the top menu and select ‘Link CAD’. This will open a dialog box where you can locate and select your CAD file. Make sure you check the positioning, scale, and units to match your Revit project.
11. Can I Modify a Toposurface in Revit?
Yes, you can modify a toposurface in Revit using the ‘Edit Surface’ tool under the ‘Massing & Site’ tab. This tool allows you to add or remove points, and adjust their elevations to reshape the surface. You can also split a surface, merge surfaces, or create graded regions.
12. What are Site Components in Revit?
Site components in Revit are 3D model elements that you place on your site for enhanced visualization and realism. These can include trees, shrubs, cars, street furniture, and other outdoor elements. Site components are critical in representing the environment surrounding your building.
13. How do I Adjust the View Range in Revit?
In the ‘Properties’ panel of your view, scroll down to find the ‘View Range’ option and click ‘Edit’. Here you can set the ‘Top’, ‘Cut Plane’, and ‘Bottom’ heights according to the specifics of your project, controlling what elements are visible in the view.
14. Can I Create Custom Annotations in Revit?
Yes, Revit allows you to create custom annotations. In the ‘Annotate’ tab, you can use the ‘Symbol’ tool to create custom annotation symbols. Additionally, you can create custom text types with specific font styles and sizes using the ‘Text’ tool.
15. What are the System Requirements for Revit?
Revit is a powerful 3D modeling software with system requirements that vary depending on the version. Generally, you would need a Windows operating system, a multi-core processor, 16GB or more RAM, and a dedicated graphics card with at least 4GB of memory. For the most current requirements, check Autodesk’s official System Requirements for Revit.
16. Can I Collaborate with Other Team Members in Revit?
Yes, Revit supports collaborative work through a feature called ‘Worksharing’, which allows multiple team members to work on the same project file simultaneously. To further enhance collaboration, Autodesk provides cloud-based collaboration tools such as ‘BIM 360 Design’ where project files can be accessed and edited anytime, anywhere.
Conclusion
Creating a site plan in Revit is a multi-step process that requires careful planning and execution. While the task might seem overwhelming at first, with practice and understanding of Revit’s robust toolset, architects and designers can create comprehensive and accurate site plans with ease. From basic setup to importing context, creating toposurfaces, adding details, and optimizing views, each step contributes to a more efficient and comprehensive design process.
In conclusion, Autodesk Revit provides a powerful platform to create site plans, offering opportunities for customization, detailing, and enhancement. Whether you’re creating a simple layout or a detailed plan for a complex site, Revit’s capabilities can cater to your needs. Remember, the goal is not just to create a plan but to tell a story of the site – its present, proposed future, and how it interacts with its surroundings.


